At Roblox, we strive to help builders create anything imaginable easily and efficiently. To that end, we’re constantly introducing new and exciting features in Studio to provide the community with the tools they need to bring their dream game or experience to life. In our previous blog post, we provided three tips to teach you some of the basics. Today, we’ll be looking at even more quick tips to make building in Studio a breeze.
Tip 1: Rebinding Hotkeys
I’ve found all the hotkeys in my previous post useful for speeding up the building process, but there are some things that weren’t yet bound to hotkeys and some hotkeys that I would’ve preferred to have been bound to something else. Luckily, Roblox Studio allows you to bind and rebind hotkeys to optimize your preferred building style.
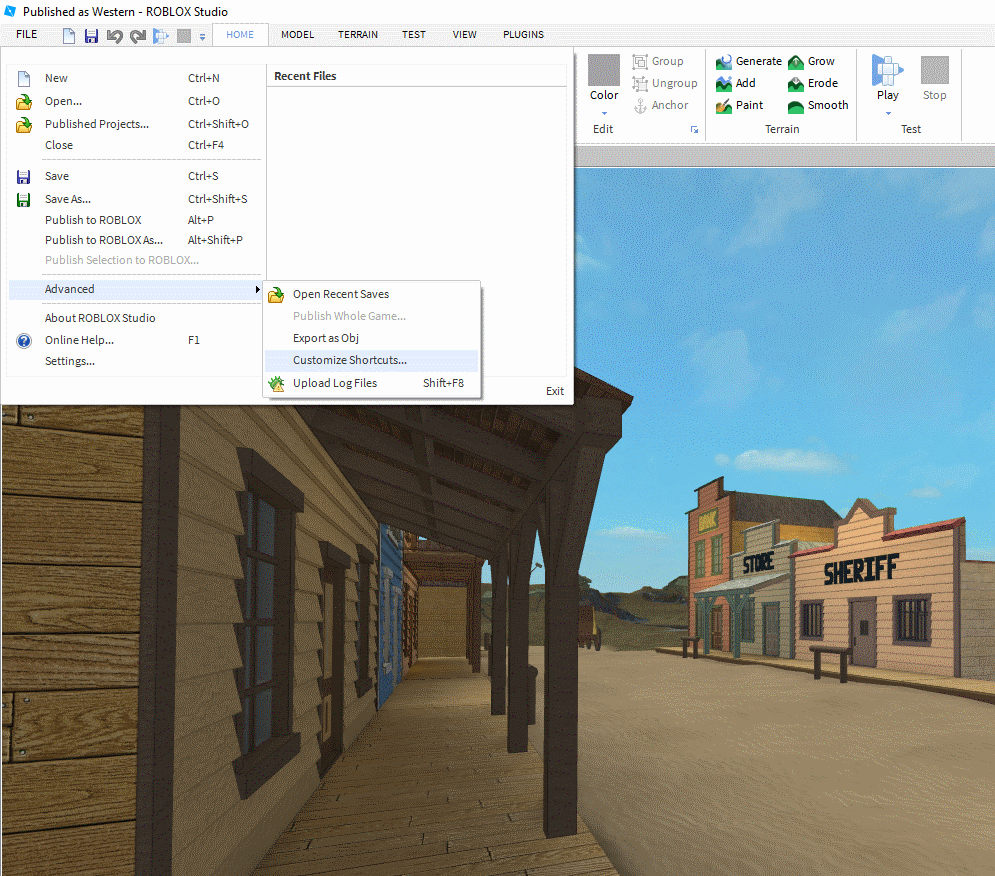
To do this, click the “File” tab at the top left in Studio and navigate down to “Advanced.” A rollover box will appear. Click on “Customize Shortcuts” and it will bring up a menu for key rebinding. On the top bar of this menu, you are able to search for any specific functions you would like to bind. To rebind a key, double click the shortcut field of the function you want to rebind, then press whatever key or key combination you would like to rebind the function with.
There are several keys I find to be crucial to bind or rebind in Studio. This ultimately comes down to preference, but the setup below works for me:
- Rebinding the Select, Move, Scale, and Rotate tools to the 1 through 4 keys instead of Ctrl + 1-4
- Rebinding the Transform Tool to the 5 key
- Rebinding One Stud Grid to Ctrl + 1
- Rebinding ⅕ Stud Grid to Ctrl + 2
- Rebinding Grid Off to Ctrl + 3
While those are the biggest changes I’ve made to my personal setup, you may find it easier to bind them to different keys or you may find you need more tools bound to keyboard shortcuts for easier access.
Tip 2: Using The Transform Tool
Transform is an all-in-one move, resize, and rotate tool. Whenever I’m creating something in Studio, this is a crucial tool to to use.
The Transform tool allows you to move objects on a selected plane. Unlike the Global/Local planes, with this tool, you can move parts parallel to each other by selecting a specific plane. This is extremely useful when working with objects that have been rotated. Simply select a part with the Transform tool, and a circle with a grid inside it will appear in the top-left corner. Click on it, and then click on the surface of another block to set the movement axis.
Tip 3: Decals and Textures
If you have any experience with Studio at all, you may already be familiar with decals and how they’re used. On top of decals, Roblox also allows you to use textures, which are different objects that allow you to tile your image. In the picture below, for example, the part on the left contains a decal that I applied from the toolbox. The part on the right contains a texture using the same asset ID.

The textured brick image looks a lot more fitting next to Ezebel since the bricks are closer to the size you’d expect. You can edit the size of the bricks by modifying the “StudsPerTileU” and “StudsPerTileV” properties, which adjust the width and the height respectively. Changing the value any higher than 1 in these options will tile your decal that many times.
This doesn’t mean that decals have no utility; rather, decals have the advantage of automatically fitting your image to be the same size as the brick. For instance, the sign that Ezebel is holding uses a decal to display the Roblox logo, which fits perfectly on the part.
Those are our tips for becoming a better builder in Studio! You can find even more helpful tutorials and video lessons on the Roblox Wiki. Until next time, keep on growing as a builder and mastering Roblox Studio!