Whether you’re new to Roblox or a veteran, you may still have questions about Studio and how it works. Here are three tips that can help you level up your Studio abilities.
Tip 1: Hotkeys
If you’re at all familiar with other 3D modeling and world-building software, you may already know that all the pros memorize their hotkeys. What you may not know is that Roblox Studio has a lot of hotkeys already set up for you to use to make building more expedient. The following are some of the handiest default hotkeys:
- Ctrl + L changes your movement/rotation orientation from the global axis to a local one. This is useful if you want to move an object at the angle at which it’s rotated instead of along the XYZ axis of the workspace.
- Alt + L equips the Lock Tool.
- Alt + A equips the Anchor Tool.
- Ctrl + Shift + N changes your parts’ state to Negate.
- Ctrl + Shift + G unions your parts together.
- Ctrl + I to access the advanced objects field quickly (this allows you to insert things like meshes and other advanced objects into parts or the workspace).
- Ctrl + the 1 through 4 keys will equip the Select, Move, Scale, and Rotate tools respectively.
- Ctrl + D duplicates the part or model in the same position as your selection.
- Ctrl + F focuses your camera on a selected part.
Tip 2: Studio Settings
When you first install Studio, it’s already set-up and ready to go for anyone just starting out. But if you want to increase your efficiency, there are a few settings you can modify to get the most out of everything Studio has to offer.
Access your settings under the “File” tab on the top left. After clicking on the “Settings…” option, you’ll find a variety of panels that will change different settings in Studio. Here are a couple settings that I find most helpful to change:
Under the “Studio” tab in Settings, you can modify the camera move speed. This is useful when you want to make large terrain changes or edit small details quickly, especially if you have a large map. Conversely, if you’re working on a detailed model, reducing your camera speed allows you to move around more accurately. For reference, the default camera speed is set to 1.5.
Another setting that may be useful for you to change is the “EditQualityLevel,” which is located under the “Rendering” tab. By default, this setting is set to “Automatic,” which means it will automatically set your quality level based on your system’s capabilities. However, depending on your computer’s specs, it may set you to a lower quality setting and you won’t be able to see certain graphical effects, particularly those relating to neon and lighting. Any quality level from 12 and above will display neon and other cool effects, so if your computer can handle it, I recommend a setting of 12 or higher.
There are plenty of other settings you can experiment with, but just remember to be careful if you’re not sure what the setting does. You can restore your settings to default by clicking “Reset All Settings” in the Settings tab.
Tip 3: Lighting Tricks
Ever wonder how the top games always seem to pop? They look so crisp; everything is well lit and atmospheric. Well, luckily for you, it’s not as difficult as you might think to set up advanced lighting effects.
If you’re in Studio, find the “Lighting” object in your Explorer window. From there, use the Ctrl + I shortcut to open Advanced Objects. Once it’s open, search “Effects” in the search field. This will populate with some lighting and audio effects. The audio effects can be ignored; what you’re looking for is BloomEffect, BlurEffect, ColorCorrectionEffect, and SunRaysEffect.
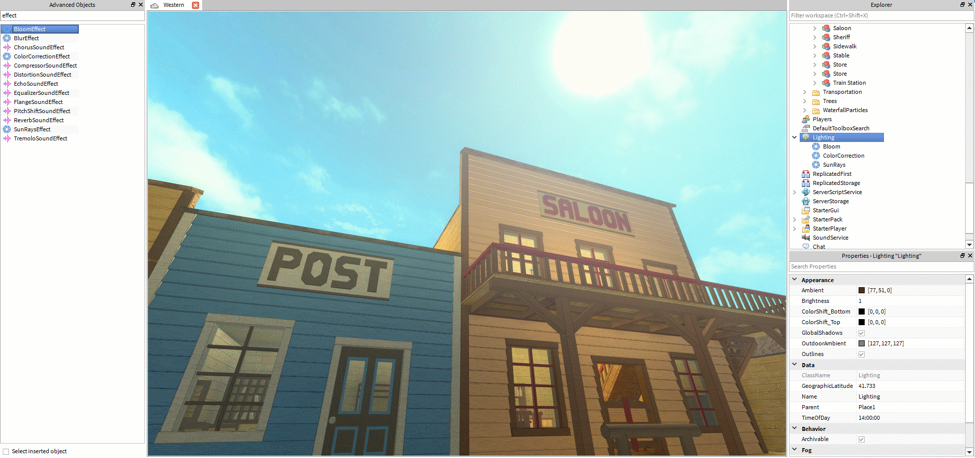
The Bloom Effect adds a glowing effect to your place.
The Blur Effect is most often used in menus to blur the background whenever the player is supposed to be focused on the menu.
The ColorCorrection Effect adds a color tint to your place and allows you to edit the brightness and contrast of that tint.
And lastly, the SunRays Effect applies rays to the sun, which can be great for bright, summer-time maps.
I hope you’ve found some of these tips useful. If you have any questions, you can always refer to the Roblox Wiki to find more in-depth answers on some of the things I touched on.
Stay tuned for more tips and tricks! Until next time, keep on creating awesome experiences in Studio!