Blog Archive
Since the launch of our new batch of Constraints in July, the Roblox product and engineering team has been hard at work introducing new Studio tools that make it even easier to bring these joints to life. Today, we’re excited to present our new UI for constraint construction available now in Studio for all users!
Shortly after shipping the new constraints earlier this year, we were blown away by the creativity and sheer ingenuity of our community. We saw some amazing creations that harnessed the power of these joints to build a wide range of incredible machines and mechanisms, from vehicles with realistic suspension systems to ragdoll animations and even simple doors. Although the creation method for Constraints was limited to Lua API in our initial release, we have just launched a faster, more user-friendly system that helps you create constraints in a matter of seconds. Watch how easy it is to attach two parts using a constraint with our new UI:

With just a few clicks, you can easily attach two parts using a constraint of your choice.
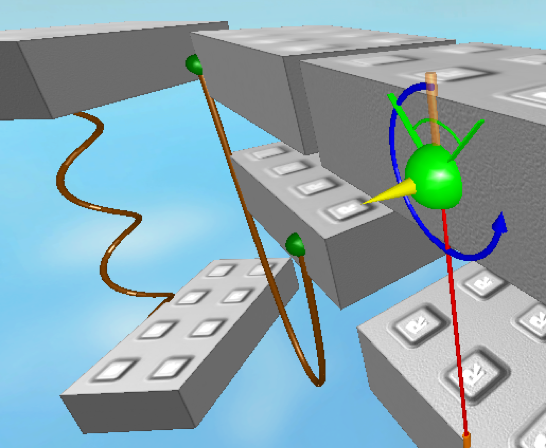
After updating Studio to version 0.261.0.87131, you will find a new tool group called Constraints under the Model tab. This tool features a drop-down menu containing each type of joint. Creating a constraint is now as simple as choosing which type of joint you want to use and then clicking once on each part to attach them. We’ve also included special rendering to help identify the location and behavior of the constraint when you’re editing it in Studio, as seen below.

Want to learn more about using these constraints with the new UI? Our YouTube playlist has tons of videos that showcase how to use constraints in a variety of situations. We plan on continuing to add more videos to this playlist, so be sure to keep checking it out for some inspiration.
We can’t wait to hear your feedback. Join the conversation now on the Roblox Developer Forum and let us know what you think!