Blog Archive
For today’s hack week adventure we explore the exciting visual world of shaders. From fog, to mosaics to cel shaders ROBLOX has never looked so good.
As a reminder, all hack week projects are temporary features built into studio for demonstration purposes only. There is no guarantee that any of the projects presented during hack week will be implemented in studio, but we can hope.
Shaders and More
Ben “jeditkacheff” Tkacheff
Ryan “ThorIsViking” McDonald
The goal of my hack week project was to expose pixel shaders to developers using ROBLOX studio. Pixel shaders are powerful visual tools for developers and produce a wide array of interesting visual effects efficiently by using the parallel nature of graphics. To implement this technology in ROBLOX we created an EffectsManager service in DataModel, which can parent local scripts to house various effects. These LocalScripts actually contain HLSL code, a common shader language. From here one can enable/disable the shaders with the LocalScript’s Disabled property, and by using a special syntax expose variable outside the script to tweak the effect (for example, the grey-scale shader has a saturation variable exposed that affects how much color is shown, this could be useful for showing how much health you have left, etc.).
To easily view these effects we created a video. All shaders demonstrated in the video use pixel shader 2.0 and have each pixel’s color and depth info. Below is the time stamp of the effects in the video.
0:00 – 0:40 – Saturation effect. An exposed variable allows the scene to be completely desaturated (greyscale), or even ov ersaturated. There is also a setting where we use the depth buffer to determine how desaturated a pixel is (the closer things to the camera have more saturation).
0:41 – 1:26 – Edge Detection + Box Blur – this shader detects edges of geometry and adds a thicker black line. The box blur helps smooth out the colors for a more cartoony effect.
1:26 – 1:47 – Wave Distortion + Radial Blur – samples neighboring pixels in a sine wave fashion to cause a sort of wavy appearance. This is combined with a full screen radial blur to make the scene even more disorientating.
1:47 – 1:58 – Scene downsampling – a simple shader that takes a rectangle of pixels and causes them all to be the most dominant color in the rectangle, causing a downsample effect.
1:59 – 2:04 – Mosaic effect – similar to the downsample effect, except instead of a rectangle we use a circle, and add grey space between each circle.
2:05 – 2:09 – Knockout effect – essentially takes the scene and layers a slightly transparent version of the same scene offset from the center. Good for using in a game where someone takes a hit, simulating “seeing stars”
2:10 – 2:25 – Fog – similar to the fog roblox currently offers, but this also colors the skybox instead of just 3d geometry.
2:26 – end – Depth of Field – an effect taken from the camera world. Essentially defines a focal point, and depending on how shallow/wide the effect is set to, gradually blurs geometry that are not at the focal point.
Thank you to everyone who was featured in the video. You can find their places below.
Places in the video:
http://bit.ly/1TdJPJu
http://bit.ly/1QDqpjt
http://bit.ly/22iZFbS
http://bit.ly/1OhfdCv
http://bit.ly/1Nx2PB8
FXAA and Cell Shaders
Tyler “twberg” Berg
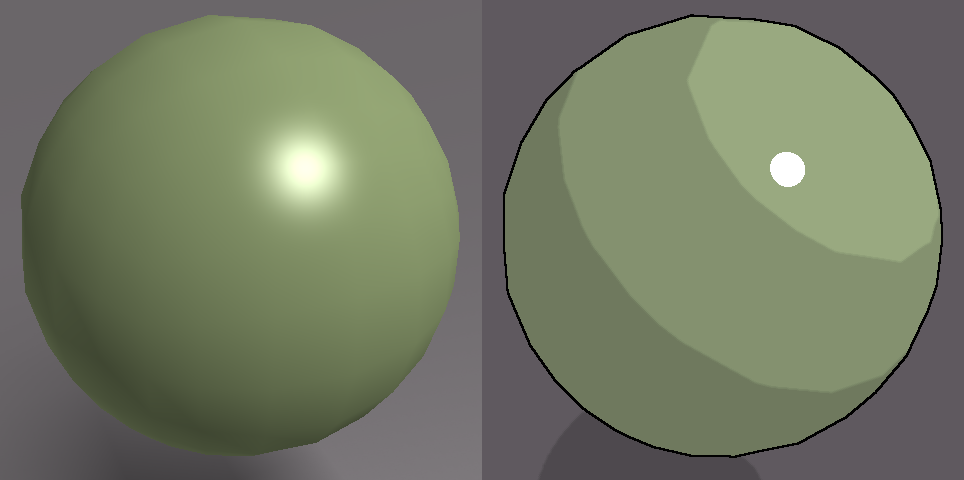
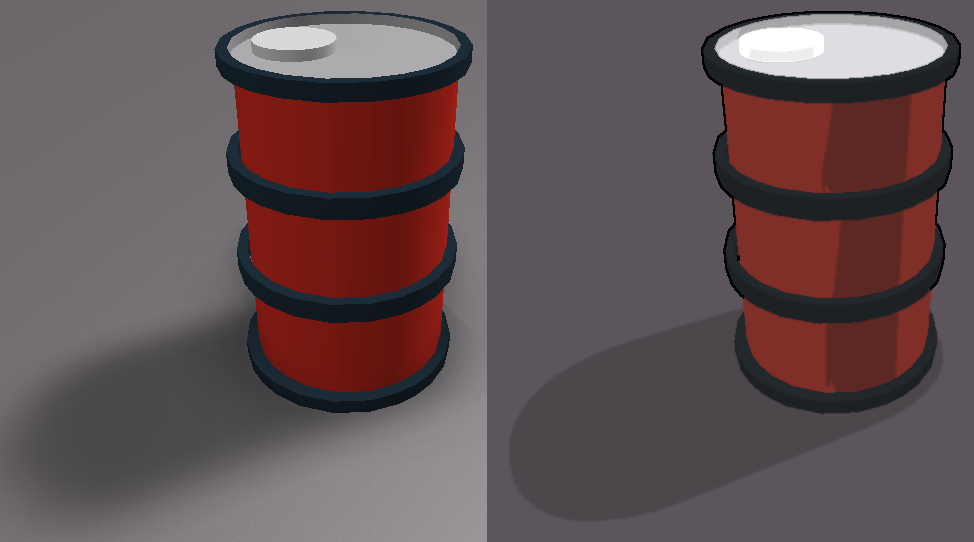
Cel Shading is a pixel shader used to give games or videos a “cartoony” look. (If you’ve ever played The Legend of Zelda: The Wind Waker, this is a good example) Below are a few images demonstrating this. The shader adds a thick black outline to parts and snaps shadows to be more defined and flat. You can also see that specular highlights have lost their softness to conform to a more cartoony look.
The second shader I worked on was FXAA or Fast Approximate Anti Aliasing.
When rendering a scene in a game, you are drawing lots of triangles to your monitor. One of the problems with this, is that triangles have infinite resolution, while your monitor does not. What happens as a result is called aliasing. Here is a picture that has been blown up to show just that.

One solution is to get a really high pixel density monitor because your eyes can only see a limited amount of pixels per inch. Unfortunately most monitors today lack the high pixel density required for us not to notice these “jaggies”. As a result, it is up to the program itself to make aliasing less noticeable.
This is where Anti-Aliasing comes in. Almost all games today use some sort of anti-aliasing technique to minimize the harshness of aliasing. There are many different approaches to anti-aliasing; some blend multiple samples before they render, others blend edges or contrast.
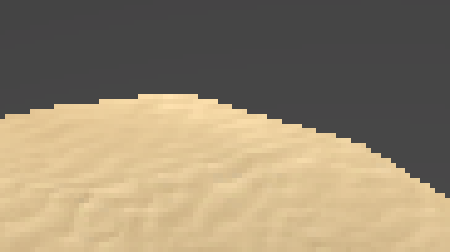
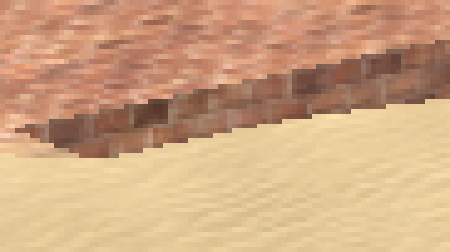
I chose FXAA because it would be fast, and easy to integrate into the ROBLOX engine. It’s primary function is looks for areas of large contrast and blend them either horizontally or vertically. Here are some examples. Keep in mind that they are also significantly zoomed in to show the difference.
Sand Terrain – The hill looks much smoother than previously
Brick Terrain – Same with brick. Notice how textures are mostly preserved.
My plan is to continue iterating on shader and rendering effects and hopefully one day have them fully integrated into ROBLOX studio.
Thanks for reading!