Blog Archive
Gamers and Developers Get New VIP Server Features
by Sorcus
Archive Developers Gamers News
By popular demand, we launched VIP Servers in late 2014 to give you an easy way to play games privately with your friends. Since then, we’ve been listening to your feedback and making updates to improve the VIP Server experience. These incremental changes include the ability to invite all your friends with one click, quickly set up competitive (and presumably epic) clan-versus-clan battles, and automatically renew your VIP Server, as well as revenue sharing for developers who enable the feature. Let’s dig into the updates.
Easy access control
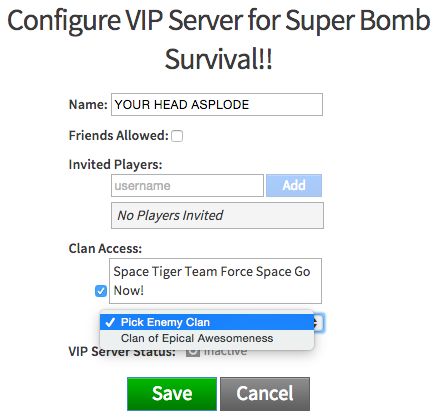
Use Clan Access to allow your clan and an enemy clan into your VIP Server.
When configuring a VIP Server you’ve created, you can now check a single “Friends Allowed” box to open your private server to all your friends, in addition to manually adding up to 50 people by username. Similarly, you can choose to allow all members of your clan and an enemy clan to access your VIP Server if you want to engage in battle.
If you’re into competitive gaming, this is the easiest way to control what teams can enter a VIP Server and get some matches going. For example, you might start up a Hex VIP Server and turn on access for your clan and a clan you want to blast into the ground. By using a VIP Server in combination with the game’s clan-tag system, you can have a private, team-based match! It’s up to the game creator to determine how teams are sorted (for instance, the developer could build the game so it automatically chooses teams based on clan affiliation), but there are many possibilities.
Clans are invite-only, capped at 100 members, and belong to a ROBLOX group. Once you’re in a clan and you have a VIP Server, you can grant access to your clan and an enemy clan using the new “Clan Access” options in the VIP Server’s configuration settings.
You can see the VIP Servers you own or to which you’ve been invited in your Inventory (click Places > My VIP Servers or Places > Other VIP Servers).
Developer revenue sharing
Starting now, developers receive 70% of the ROBUX that players spend purchasing VIP Servers. Since it often requires additional work on the game creator’s part to support VIP Servers, this revenue sharing offsets the time and effort – and encourages developers to offer VIP Servers!
We have heard that many developers would like to be able to set their own cost for VIP Servers, and we agree – this feature is coming in a future update.
Auto-renewing VIP servers
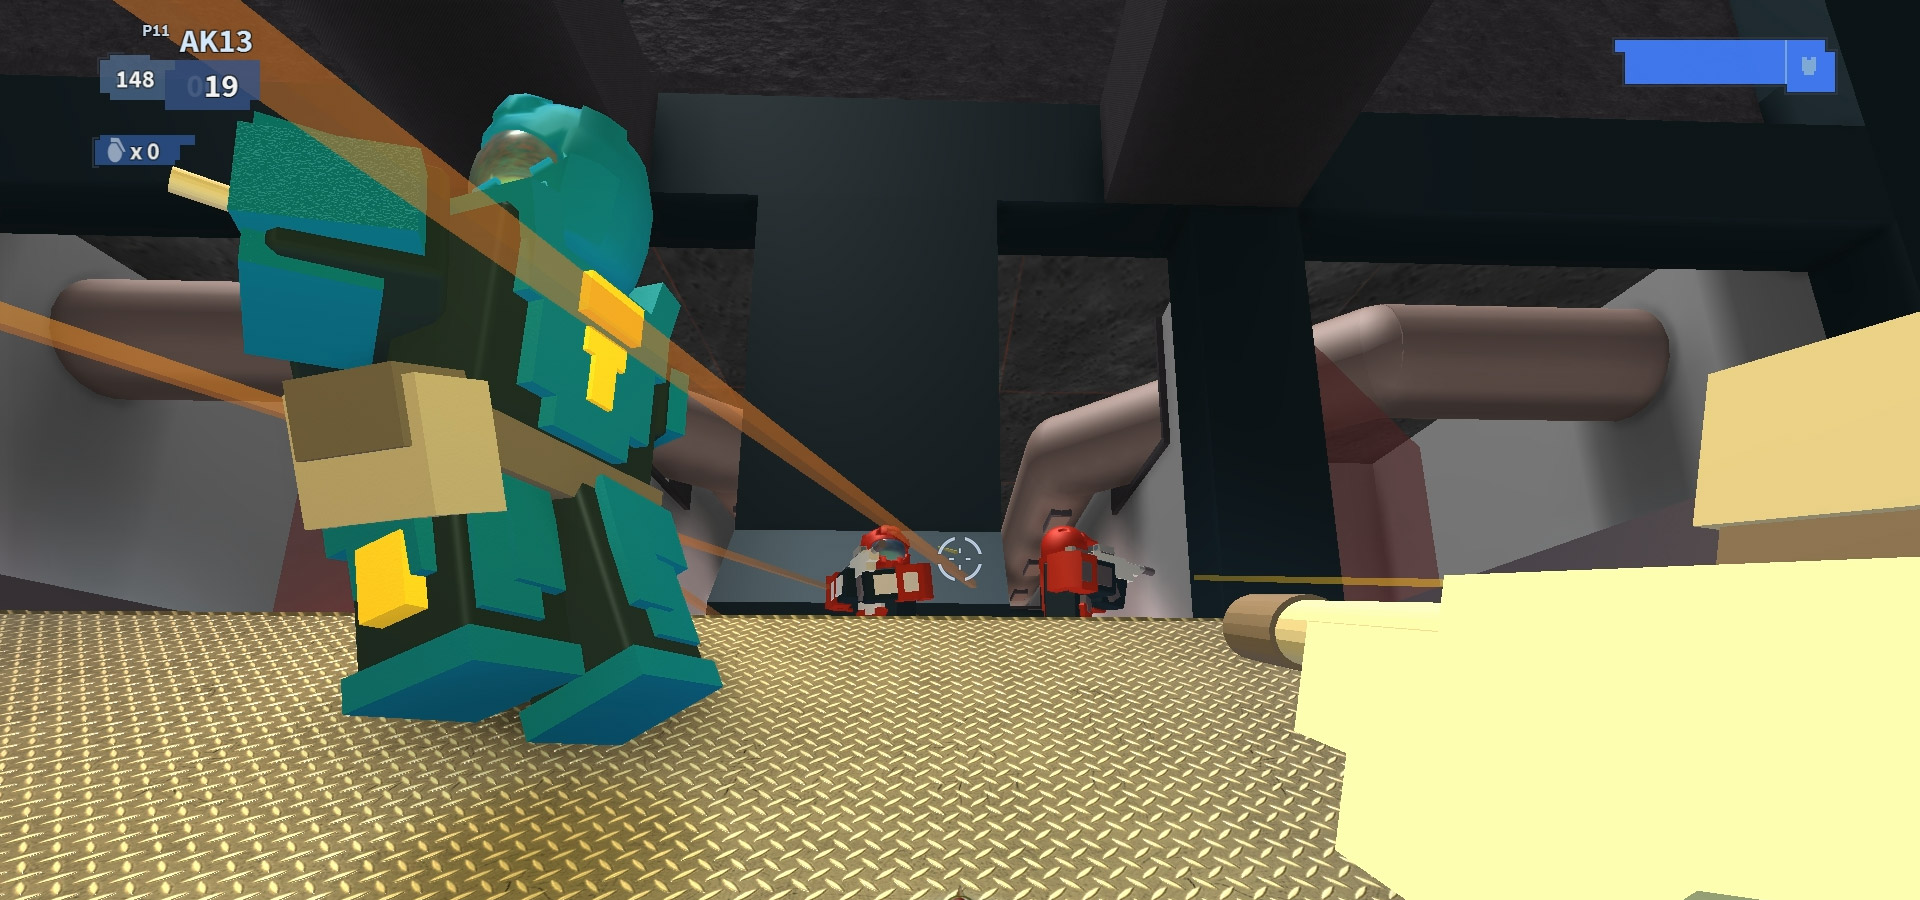
Toggle the “Subscription Status” button to turn on automatic renewal of your VIP Server every 30 days.
Going forward, new VIP Servers cost 100 ROBUX for 30 days of use and automatically renew every 30 days. If you don’t have enough ROBUX to keep your server running, the automatic renewal will not occur. If you decide you do not want to keep your VIP Server running, you can choose to end the subscription at any time in the configuration settings. It’ll continue to be live through the end of the current 30-day period.
VIP Server basics
If you’re new to VIP Servers or just need a refresher, read through this brief step-by-step guide to learn how to create and set up a private game with friends.
Creating and configuring a VIP Server
To create a VIP Server, all you have to do is visit the page for a game that supports the feature (for example, Work at a Pizza Place) and follow these steps:
- Open the Game Instances tab (here you’ll see any VIP Servers for this game that you’ve been invited to, as well as all the public servers)
- Click the Create Server button
- Enter a name for your VIP Server
- Click Buy Now
Your VIP Server is a real thing! Now, let’s configure its settings:
- Open the Game Instances tab (you’ll see your new VIP Server at the top)
- Click the three dots in the upper-right corner of your VIP Server module and click Configure
- Edit the name, choose who has access, activate or inactivate your server, and toggle the auto-renewal subscription
- Click Save
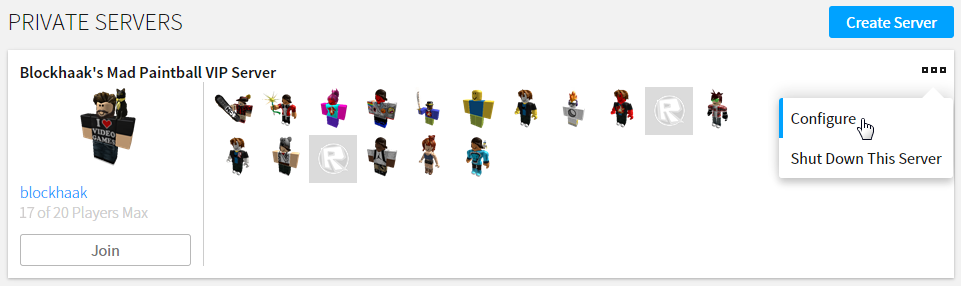
Open the Game Instances tab and use the three dots to access your VIP Server’s configuration settings.
You can see the VIP Servers you’ve purchased and been invited to by visiting your Inventory (click Places > My VIP Servers or Places > Other VIP Servers). For more information on VIP Servers and how you can create and configure your own, check out the entry on the ROBLOX Wiki.
What would you like to see next in VIP Servers to make them even better? Let us know in the comments!