Blog Archive
Streaming to Twitch is a great way for you to participate in and contribute to the ROBLOX community. You can broadcast the creation of a game so others can see how you do what you do, build a channel and audience of your own, and help spread the word about ROBLOX. We’re really happy to have seen thousands of ROBLOX gamers and developers get started on Twitch in the last year, and, now that one of the top streaming applications is available for Mac, we hope this guide will help even more of you start your own channels.
Ready? Here’s a weekend project.
Step 1: create a Twitch account
Step one of streaming on Twitch is to go to Twitch and create an account for yourself. It’s free, but you do need to be 13 years or older to open a channel.
Step 2: get your streaming software
OBS (or Open Broadcaster Software) is open-source (i.e., free) software for livestreaming, and a multi-platform version with support for Mac and Linux has just been released. Download and install this software — we have used it here at ROBLOX, and many current ROBLOX streamers use it, as well. It has proven to work well with ROBLOX.
There are alternative streaming packages, with XSplit being one of the common for game streaming. Licenses for the full XSplit feature set do require payment, though.
Step 3: get ROBLOX running in OBS
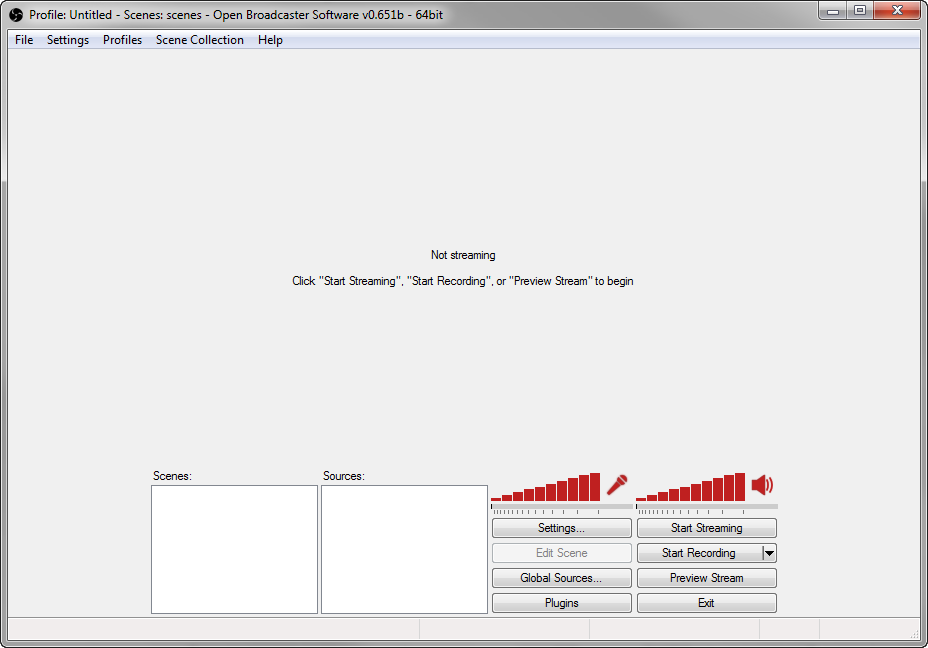
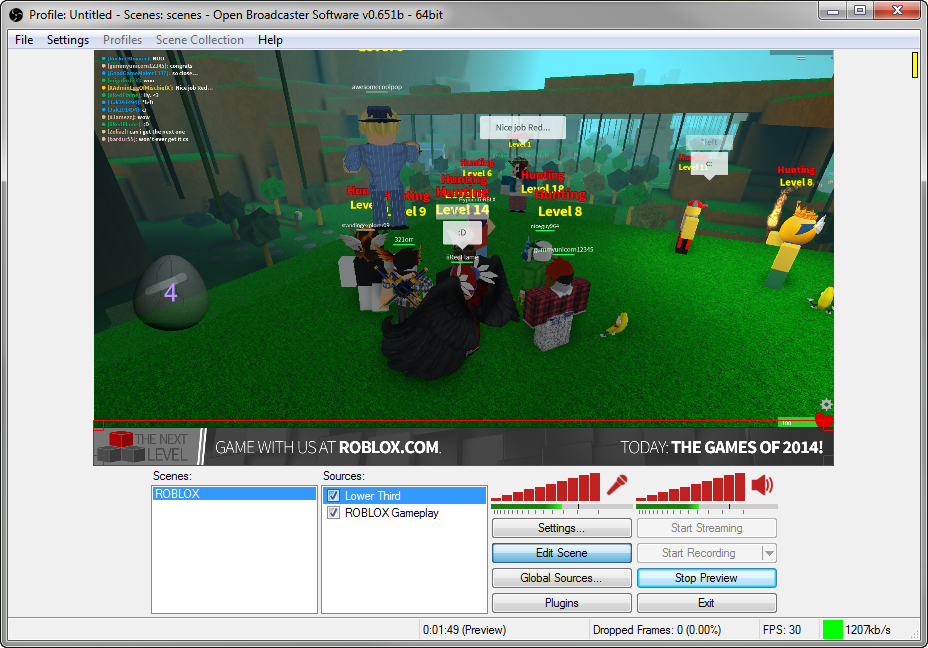
Launch OBS. You’ll see a screen like this. It doesn’t look like much, but it soon will.
Next, right click in the white space under Scenes and click Add Scene. Title it ROBLOX. This will serve as the “container” for your video sources.
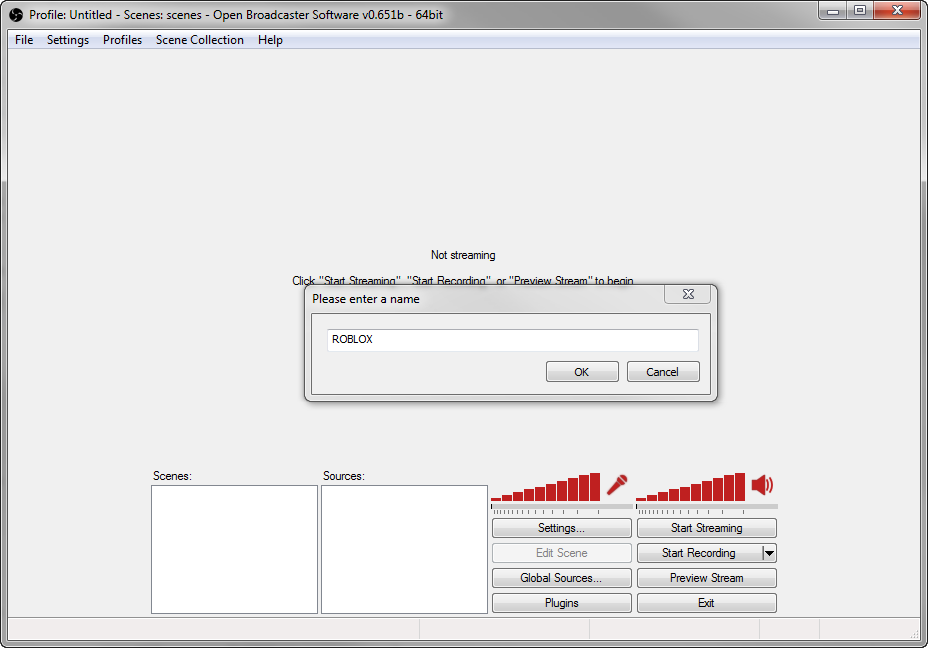
Now, launch a ROBLOX game and switch back to OBS (use Alt+Tab if your game launches in full-screen mode). Back in OBS, right click in the white space under Sources and click Add > Game Capture. Title it ROBLOX Gameplay.
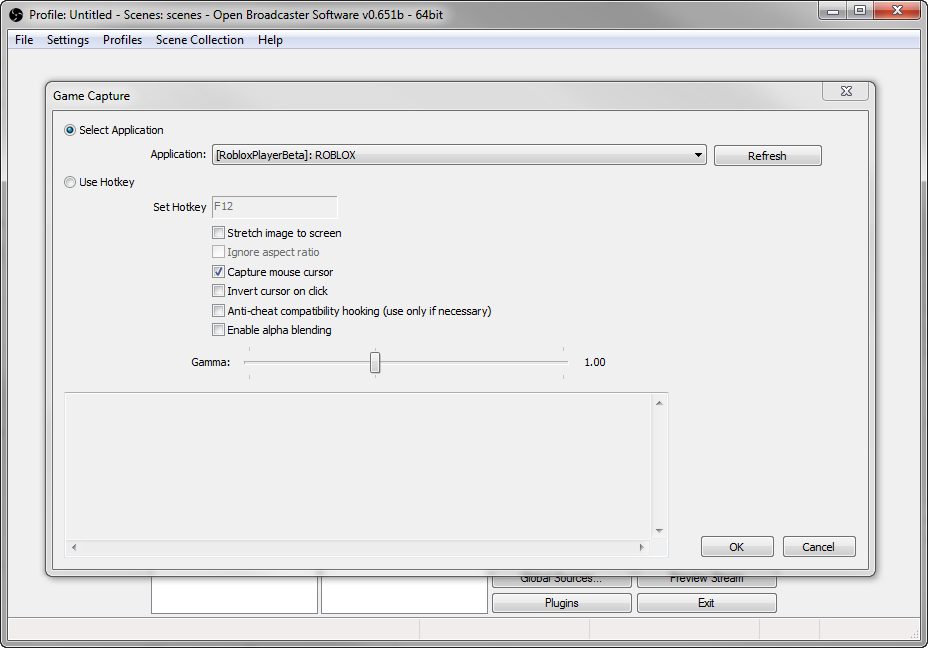
With the Select Application radio button selected, use the dropdown box to select ROBLOX (look for [RobloxPlayerBeta]: ROBLOX for playing or [RobloxStudioBeta]: ROBLOX Studio for development). You don’t need to worry about any of the other checkboxes at this time. Click OK.
At this point, OBS is capturing your gameplay (both video and audio) and microphone input. Click Preview Stream to verify that it’s working – you should see a video feed (if you don’t, make sure ROBLOX isn’t minimized) and your audio meters should be moving. There’s one audio meter for your microphone and one for in-game sound.
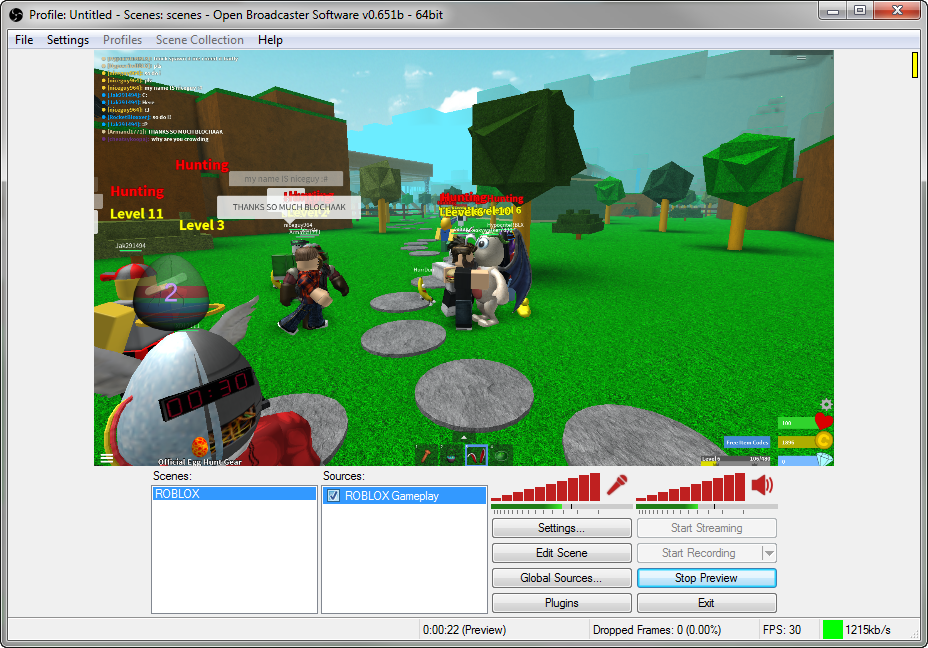
Once you’ve confirmed the game capture and audio meters are working, click Stop Preview to continue working on your stream.
If you are not getting microphone audio, click Settings > Settings > Audio and make sure the correct microphone is selected as the Microphone/Auxiliary Audio Device. You might need to tweak your microphone settings in the Windows Control Panel to enable your microphone or increase the volume.
Congratulations, you’ve set up a live video feed with voiceover! Now, to get it to Twitch.
Step 4: make your stream live
After you create a Twitch account, you can generate a unique Stream Key for your channel. This is a long, random set of characters you need to push gameplay from your computer to your Twitch channel.
To get your Stream Key, log into your Twitch account and go to twitch.tv/dashboard. (Alternatively, expand the control panel on the left side of any Twitch page and click Dashboard.) From the Dashboard, click the Stream Key link. Click the Show Key button, then copy the entire string of characters. Don’t give this key away to anyone – unless you want other people streaming to your channel.
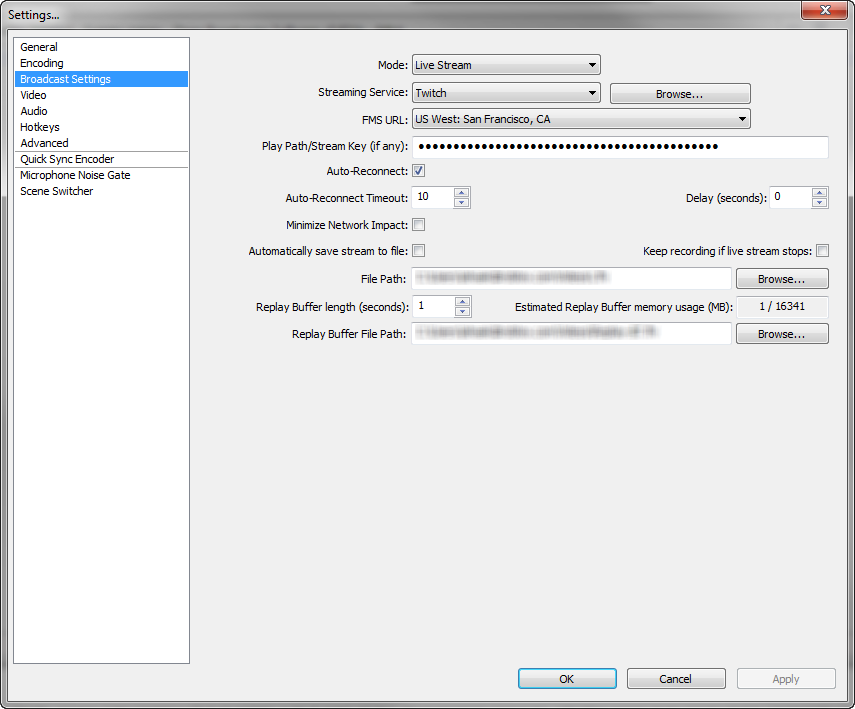
Switch back over to OBS and click Settings > Settings > Broadcast Settings. Change your streaming service to Twitch using the dropdown box, then enter your Stream Key under Play Path/Stream Key (if any). You can leave the rest of the settings as they are and click OK.
Now, from the main OBS screen, click the Start Streaming button. (Make sure you stop your preview first, if it’s still running.) Your gameplay will start broadcasting on Twitch after a short delay. There will always be a delay of at least 15 seconds or so.
You can now ignore the OBS window and start playing ROBLOX. You might want to check your Twitch channel to make sure the broadcast is successful, but make sure the Twitch player’s audio is muted.
Step 5: customize your stream
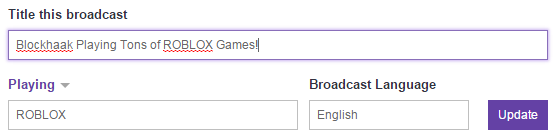
If you want people to be able to find your stream (and you do), make sure you give it a descriptive name on Twitch and specify that you’re playing ROBLOX – in all capital letters. This tells viewers what you’re doing and will list your channel in the ROBLOX directory on Twitch. You can set this information on your Twitch Dashboard.
You can also customize your video stream by adding graphics. For example, on ROBLOX’s streams, we add a “lower third” that includes the title of the show, a logo, and basic information on where to find ROBLOX.
To add a graphic in OBS, right click in the Sources area and click Add > Image. Locate the graphic you want to add and click OK. From there, you’ll want to click Preview Stream and, once the preview is running, Edit Scene. The Edit Scene button allows you to click and drag the graphic you just added (or whatever element is highlighted with a red border) to move it around and resize it as desired.
Adding a webcam
Integrating a webcam video feed into your ROBLOX stream adds a nice personal touch, though it is strictly optional. Adding it to the feed is pretty simple.
- Right click in the white space under Sources
- Click Add > Video Capture Device
- Choose your webcam from the dropdown Device list
- Click OK
Make sure your webcam feed is listed above your ROBLOX game capture source. If it isn’t, right click your webcam feed in the Sources area and click Order > Move Up until it is visible. Use the Edit Scene button to resize it and move it into the appropriate area of your stream.
More information
You should be able to stream ROBLOX with an upload speed of 3 mbps or higher. You can test your upload bandwidth by running a speed test at speedtest.net. You need to have modern computer hardware, as well.
The quality of your stream will depend on your system hardware and internet connection speed. If you need to adjust quality settings to improve performance, here are a couple OBS tips:
- Click Settings > Settings > Encoding. Try adjusting the Max Bitrate figure. A lower number will result in less data getting pushed from your computer to Twitch.
- Click Settings > Settings > Video. Use the Resolution Downscale dropdown list to choose a lower resolution (for instance, 1280×720 is still an HD stream but requires much less computing power and network bandwidth).
- If your performance is good, consider changing the FPS (via Settings > Settings > Video) from 30 to 60 for smooth video!
We also recommend browsing Twitch’s complete guide to livestreaming with OBS. This will help you choose the right settings (bit rate, frame rate and resolution) for your hardware.
Good luck and we’ll see you on Twitch!