Blog Archive
 Last month, ROBLOX launched a new rendering feature known as “outlines.” Outlines essentially draw a black border around all the edges you see in ROBLOX worlds; helping to establish a more unified aesthetic between the vast array of creations. While they’re a work in progress and we’ve since decided to make them optional, the way we arrived at their implementation was a challenging process of considering the industry standards and developing our own solution. We ultimately settled on a technique that fits squarely within the confines of our platform and is entirely scalable to a wide range of legacy hardware.
The Extrusion Method
With the extrusion method, developers first create an extruded (slightly bigger) version of the 3D object, render it black, and place the original object on top–the resulting image creates the illusion of a black and bold frame encompassing the 3D object. This is an expensive process computationally–in order to pursue this method, we’d have to render everything twice (the object and the outline frame), which would lead to a larger pool of users with older hardware who simply couldn’t experience ROBLOX. So we took a look at…
The Silhouette Method
Using the silhouette method, you determine the silhouette edges of a 3D object. Say you have a cube, tilted at a 45-degree angle. Each side of that cube will either face the camera or not. So you develop an algorithm that tries to determine which edges have a visible face and which don’t. Movement makes this method much more complicated. Once things start moving, whether that’s the object or the camera, the lighting properties have to change, as do the lines around the object. To do this, complex geometric analysis must be used to determine the line properties of the object from every conceivable angle in 3D space. Like the extrusion method, the silhouette method was an interesting avenue to explore, but ultimately required too much computational force to align with our platform.
Hardware Lines Method
One of the more streamlined methods for creating lines is the hardware lines method, which we looked at extensively. With this method, every single edge or corner (meaning this does not apply to spheres) of a 3D object would get the outline treatment manually, after the object was drawn. This sounded good to us in theory, though we quickly realized that adopting this method produces lines that are not anti-aliased. As a result, the lines created from this method came out pixelated, which is a look we really wanted to avoid.
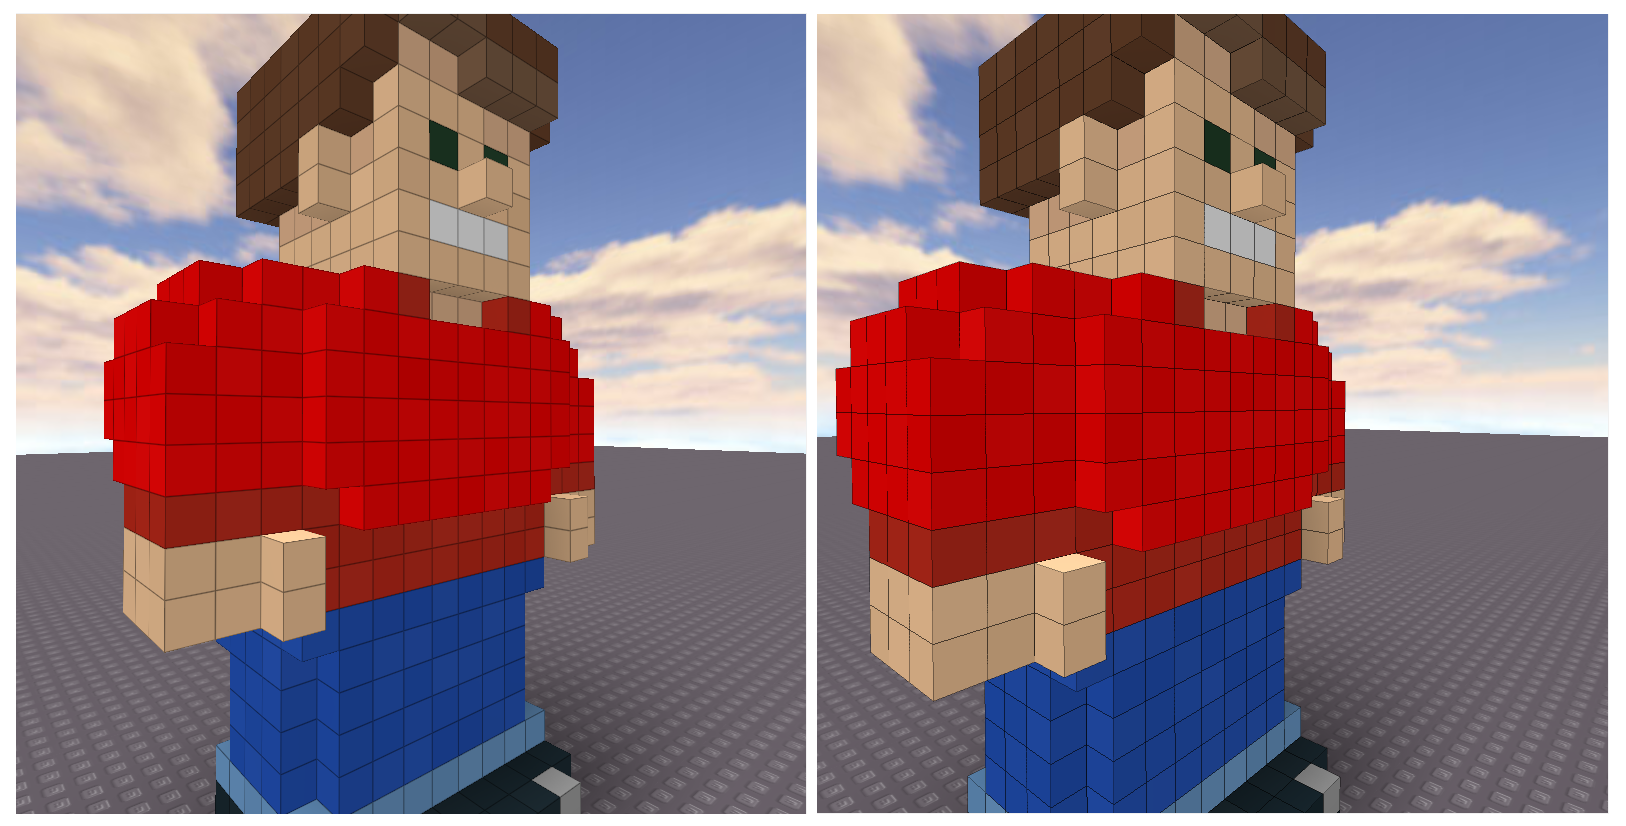
Experimenting with different methods. Anti-aliased on the left, and hardware lines on the right. Interesting difference, right?
Post Effects Method
This is how many modern game developers apply stylized outlines to their games. Let’s use an example. Say you render a a 3D vehicle without outlines. Using the post effects method, you would then analyze the vehicle based on pixel depth. This is determined using a depth map that goes over top of the render. This map gives you full control of every pixel on the car, and you can set the depth of each part of the vehicle. What does this mean? On a simple level, it means this: whichever part of the vehicle is closest to you in 3D space, is also lighter. Parts that are further away from your line of site are darker. The key is finding the middle ground, and producing a realistic real-time gradient between light and dark. You can do this by setting parameters. For example (these numbers vary wildly depending on the creation and size of the build), your parameters could dictate that something one stud away is black, while 0.1 stud away is white. This method is labor intensive and involves a lot of stylized tweaks (we won’t get into the blurring aspect, which is enough to generate another article and in of itself), but we couldn’t use this method, as it requires more performance than mobile devices can offer. An interesting aside, though, is we’ve seen members of the ROBLOX community attempt to “cell shade” our platform using this method. Most recently, we saw this screenshot floating around our Twitter community.
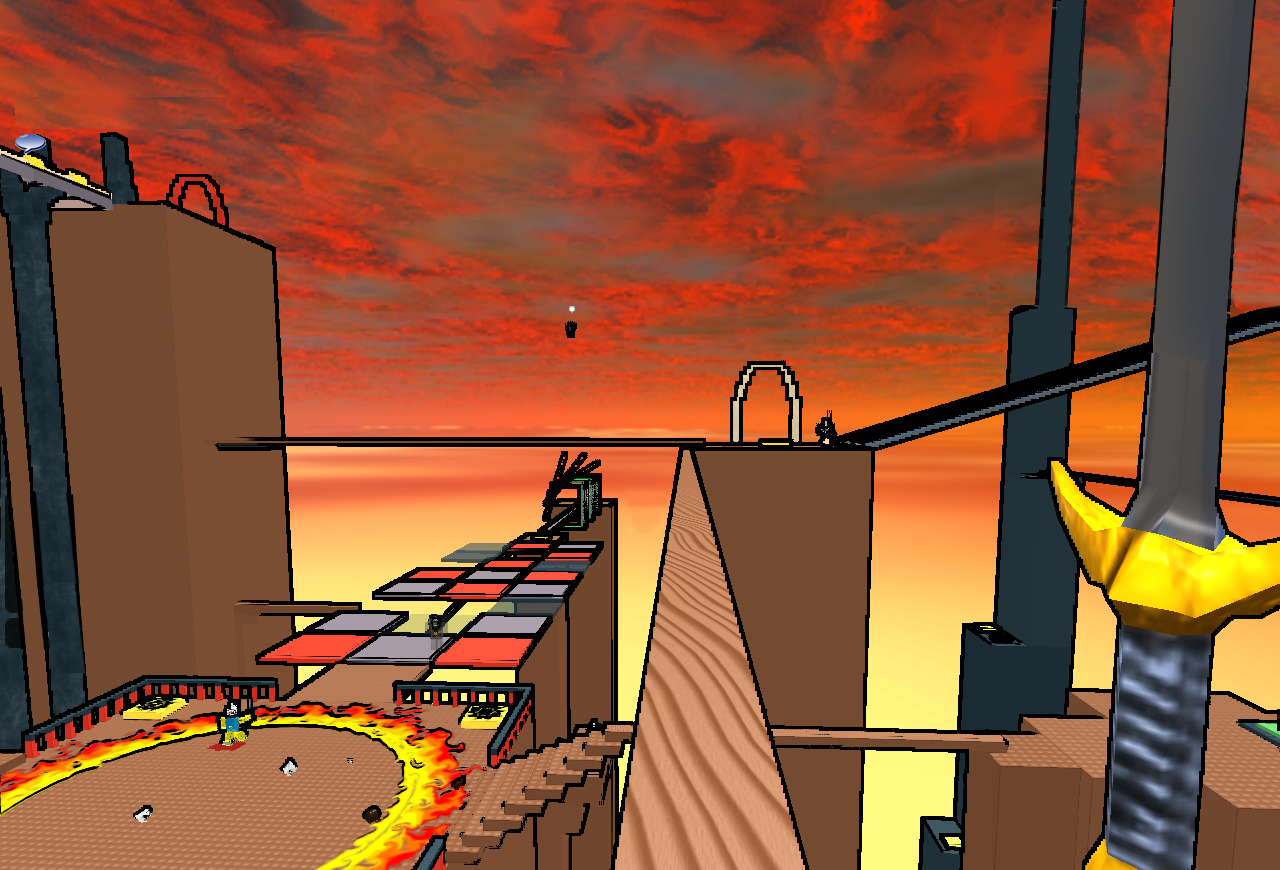
A bit more dramatic than what we ended up going for…
Our Unique Solution
 We came away from the drawing board knowing we’d have to develop our own system if we were to enable outlines. We wrote our outline rendering into our shader system, which cuts out on re-rendering workloads (which was a burden in the first two methods we described). Think about them as fine-grained textures that are produced on each face of the 3D object. For a simple example, imagine a cube. This cube is composed of thousands of pixels. Every single one of these tiny pixels is a slightly different color (brighter and darker variants of the prime color of the cube, which for this example we’ll say is gray).
Each face of the cube has different lighting attributes because each is shaded by light that’s hitting it at different angles. To enable outlines, we now gauge the distance of each pixel in relation to the nearest edges (which, in the example of our cube would be four per surface). This minute color change actually simulates realistic lighting–each pixel chooses its individual color dependent on the distance from the edge of the shape. This gradient change always culminates in the color black, at the very edge of the any given shape (hence, outlines). It’s like there’s a gradient map coating the cube, and pixels are communicating with that map to know exactly what color to be. The distance between corners of any given shape determines the shade of its color, without using depth maps. Our gradients are often bent, and programmed to dramatically to turn black at the very edges of each shape.
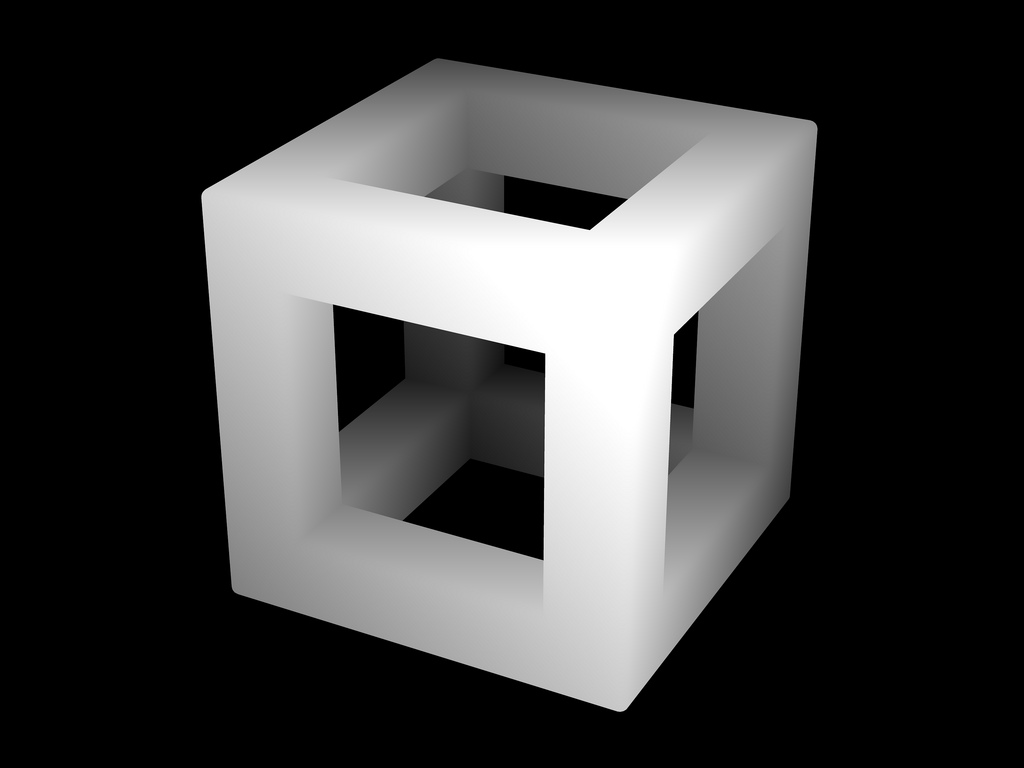
 So how do we apply lines to say, cylinders? Well, the same rules apply, though the “edges” of a cylinder become the tops and bottoms of the 3D object. What about spheres? Good question! Because our system focuses on calculating distances between corners and edges, you will never see an outline on a sphere.
This is a unique technique for rendering outlines on 3D objects, in that it’s developed in a way that supports dynamic worlds composed primarily using blocks (because it doesn’t really support smooth surfaces). At its very core, every build, no matter how detailed, is comprised of a series of shapes with edges and angles. Each of the shapes that compose 3D creations now have individual gradient maps baked in. The system is scalable to boot–we wanted to make sure that if we could do this, our mobile platform would be able to handle it as well, which it can.
We’re Listening
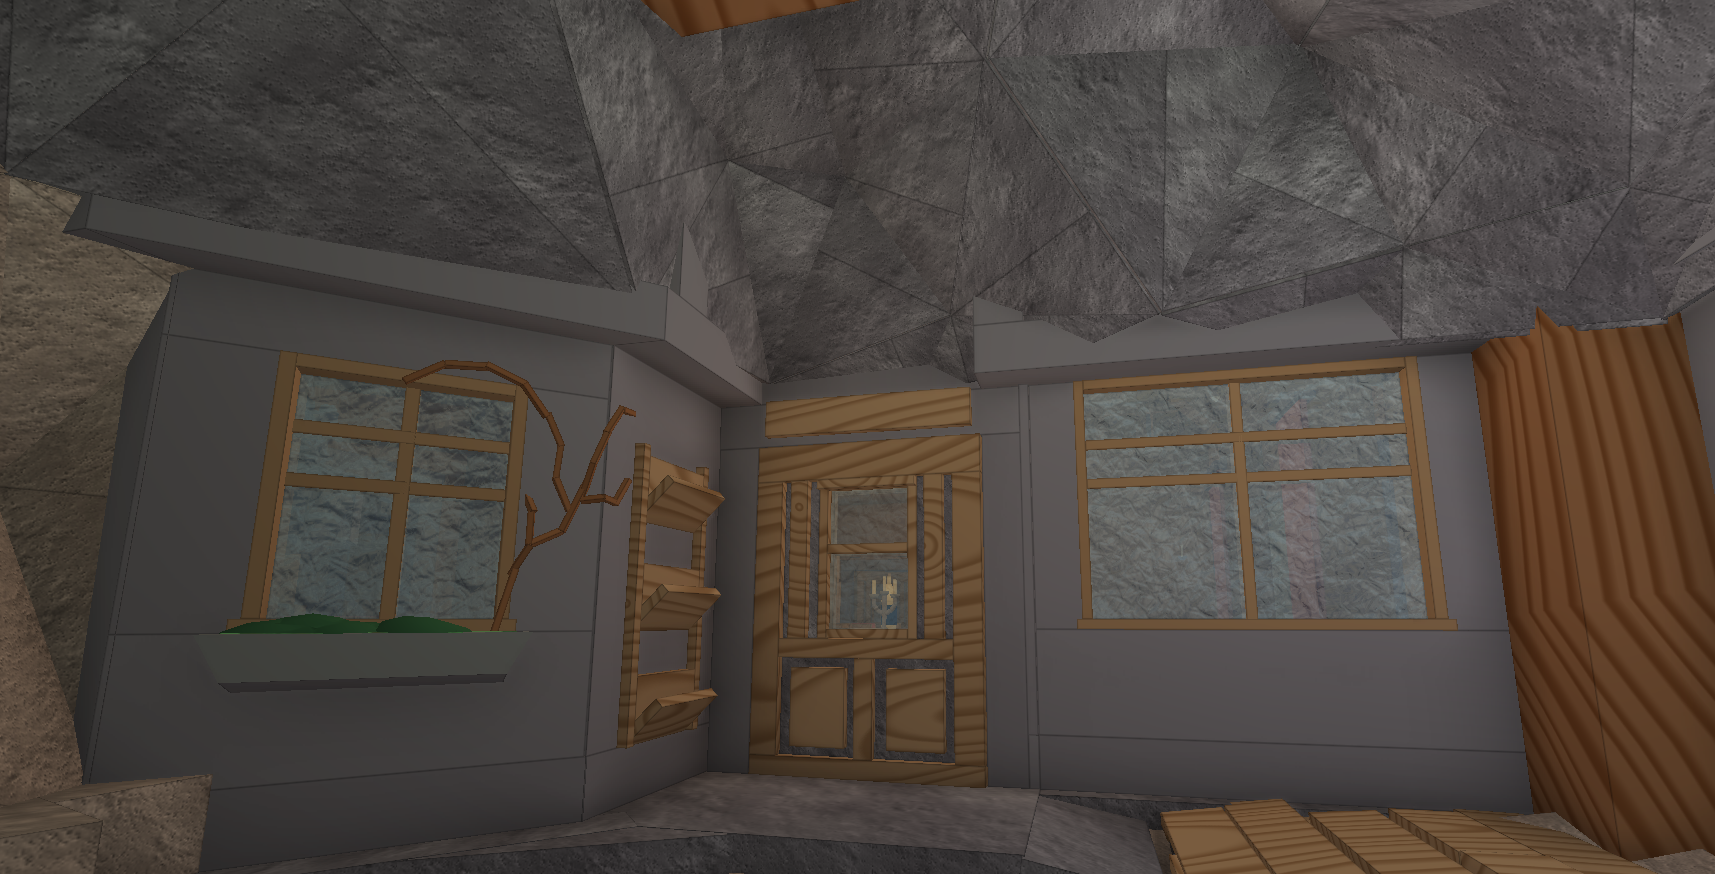
Like with any major change we implement, we’re listening to our builders for feedback. The biggest gripe with users wasn’t with new creations; it was how this new system made existing creations look different. You see, smashing and overlapping parts together to create a smooth surface has become pretty standard building practice–the right builder can overlap the right parts to create a surface that appears flat and smooth. Problem is, enabling the lines made these overlaps visible. 3D objects that once looked natural looked jumbled and hacked together. This is why we gave you the option to toggle outlines on and off–though we truly hope that builders continue to experiment with these outlines as they develop new titles.