Blog Archive
Howdy! Today’s article is for Roblox power users who want to learn how to develop scripts in Roblox. This is not a programming language tutorial – I will assume you know enough about Lua to look at a piece of code and guess at what it does. Rather I am going to teach you how to deal with buggy scripts and show how to debug them. Debugging in general is a mystical art – I use the word "art", which is the product of innate creative forces, in contrast to "science", which can be dissected, reduced, and taught. We’ve built some tools into Roblox Studio to help you though.
Part 1 – Mission Statement
We’re going to build a secret door. An easy way to make a secret door is to make a brick and set its CanCollide property to false. Anyone can them walk through such a brick. No. Our secret door is going to be special. It’s eventually going to guard the treasure room in my castle and it’s only going to let approved members of the Pirate Army through (Arrrrr!). Clearly we need some scripting here, me hearties.
Part 2 – Build From Simpler Pieces
When I’m making a complicated script, I try to test it as I go along. I’ve seen a lot of people in intro programming classes try to write all their code at once and then test it. This is about the most painful way to write code. Don’t do it. Instead, write the shortest bit of code that you can test. Test it. If it works, add some more stuff. Then test it. If something broke, you know where to start looking.
A more simple version of the door we want to make is a door that just turns transparent whenever anything touches it.
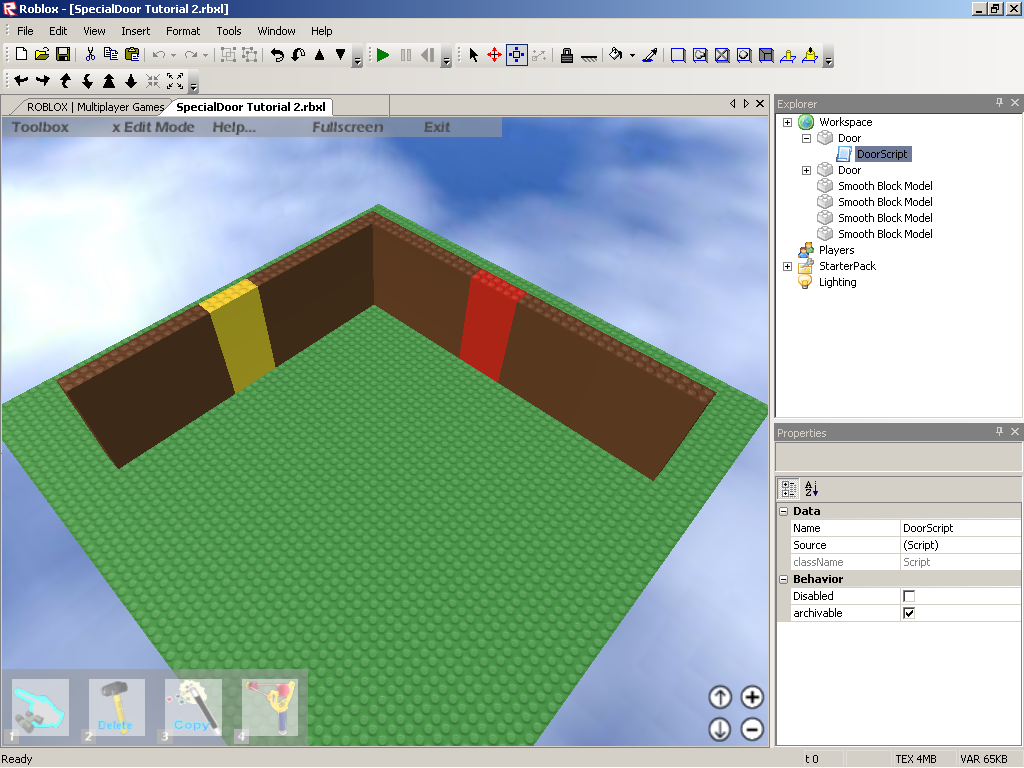 Go ahead and open up Roblox Studio. Create a simple test level, like the one pictured. In my level, the first test door is red. Use the Insert -> Object menu to insert a script under your test door (when the dialog box pops up, type the word "Script"). Do yourself a favor and give the script a descriptive name like "DoorScript".
Part 3 – Power Tools
Ok, time to break out the power tools. If you have been scripting without these, I feel sorry for you. There are two that I will talk about today: the Output window and the Command toolbar. The first is by far the most useful, so I will focus on it.
To bring up the Output window, use the View -> Output menu option. This is add a window pane to the bottom of your screen. This window will show the output from your scripts while they are running. If your script has an error in it, the error will be printed here along with the line number telling you where the script broke. Let’s look at both of these right now. In your new script, paste the following code:
print("Hello world!")
for i=1,10 do
print(i)
endscript.ThisPropertyDoesNotExist = 6
As you can probably tell, this script prints "Hello world!", spits out the numbers 1 to 10 and then crashes on an error. If you press the Run button in Studio, you can see this. The output will look like this:
Tue Feb 13 15:56:07 2007 – Script Heap Stats: Max Size = 21945 bytes, Max Count = 401 blocks
Hello world!
1
2
3
4
5
6
7
8
9
10
Tue Feb 13 15:56:16 2007 – ThisPropertyDoesNotExist is not a valid member of Script – =Workspace.Script, line 7: (null)
This is telling us that line 7 of our script is bad, which is something we already knew. However, in a more complicated script, it can be very helpful to print out stuff as the script is running so that you can see where things are going wrong. It may seem obvious once I’ve said it, but if something is broken with your script, start printing stuff out – rare is the bug that will not succumb to this level of scrutiny. I once wrote an entire operating system, using only printf to debug it.
![]() I started programming when I was in 2nd grade and a popular language to learn back then was something called QBASIC – some of you may know it. One feature of the QBASIC programming environment was something called the Immediate Window, which you could type code into and immediately see it execute. On occasion this can be helpful to debug a script while it is running. However, this is more for advanced users. You can bring up Roblox Studio’s equivalent of the Immediate Window by using the View -> Toolbars -> Command menu option to bring up the Command Toolbar. You can type code into this at any time and run it. For example, if you wanted to, you could type:
I started programming when I was in 2nd grade and a popular language to learn back then was something called QBASIC – some of you may know it. One feature of the QBASIC programming environment was something called the Immediate Window, which you could type code into and immediately see it execute. On occasion this can be helpful to debug a script while it is running. However, this is more for advanced users. You can bring up Roblox Studio’s equivalent of the Immediate Window by using the View -> Toolbars -> Command menu option to bring up the Command Toolbar. You can type code into this at any time and run it. For example, if you wanted to, you could type:
game.Workspace.Door.Position = Vector3.new(0,100,0)
And if you have a part named "Door" in your level, it will be immediately teleported to (0, 100 ,0) while the game is running. This is kindof arcane, but I mention it because I have found the Command Toolbar useful on occasion.
Part 4 – Simple Door Script
Here it is:
print("Simple Secret Door Script Loaded")
Door = script.Parent
function onTouched(hit)
print("Door Hit")
Door.Transparency = .5
wait(5)
Door.Transparency = 0end
connection = Door.Touched:connect(onTouched)
If you have ever seriously tried to learn lua scripting for Roblox, you have looked at some Roblox scripts. The code for listening to a Touch event should look familiar. Basically I have wired up the Part.Touched event to call the onTouched function whenever the part is touched by another part. When this happens, the door will turn semi-transparent for 5 seconds. Add this to your Door script, save your map, and try it. If you touch or shoot the door, you will see a nice effect. If you have the Output Window up, you will also see a "Door Hit" message printed whenever the door is touched. If you did not see this message, you would know that the onTouch function was not being called and that you had not wired up the event handler correctly.
Part 5 – A More Complicated Door
Like I said, this is not a tutorial on actually writing code, only debugging it. So here is the finished script:
print("Advanced SpecialDoor Script loaded")
— list of account names allowed to go through the door.
permission = { "Telamon", "PirateArmy", "CaptainMorgan", "SilverShanks", "JackRackam" }
Door = script.Parentfunction checkOkToLetIn(name)
for i = 1,#permission do
— convert strings to all upper case, otherwise we will let in
— "Telamon" but not "telamon" or "tELAMON"
if (string.upper(name) == string.upper(permission[i])) then return true end
end
return false
endfunction onTouched(hit)
print("Door Hit")
local human = hit.Parent.FindFirstChild("Humanoid")
if (human ~= nil ) then
— a human has touched this door!
print("Human touched door")
— test the human’s name against the permission list
if (checkOkToLetIn(human.Parent.Name)) then
print("Human passed test")
Door.Transparency = .5
Door.CanCollide = false
wait(7)
Door.CanCollide = true
Door.Transparency = 0
end
endend
connection = Door.Touched:connect(onTouched)
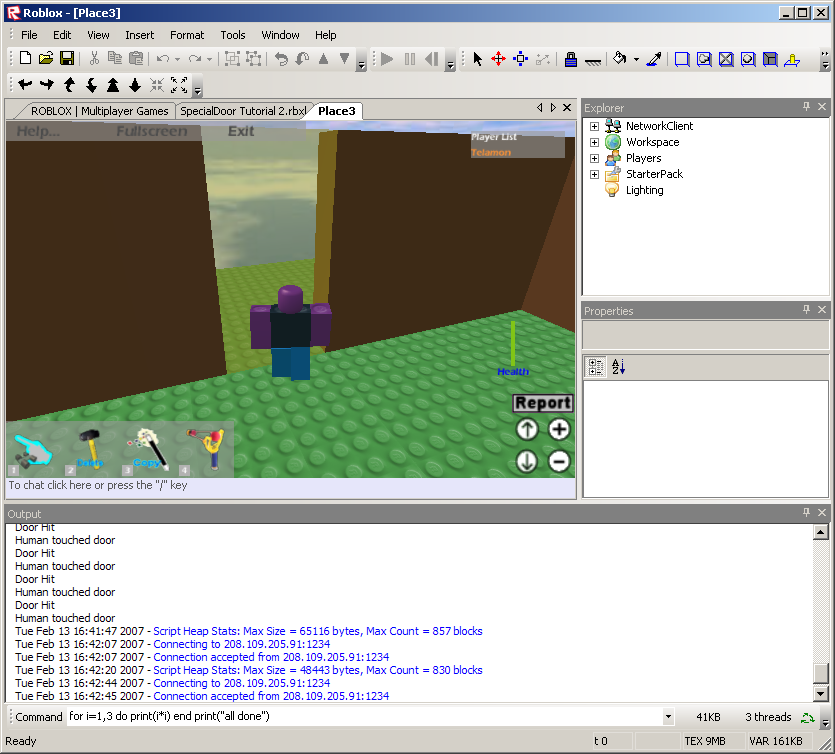
It has one bug in it. Without using the Output Window, the only thing you will be able to tell is that the script is not working. With the Output Window, the problem becomes obvious:
Advanced SpecialDoor Script loaded
Simple Secret Door Script Loaded
Door Hit
Tue Feb 13 16:44:19 2007 – Workspace.YellowDoor.DoorScript2:18: bad argument #1 to ‘findFirstChild’ (Instance expected, got string) –
Since the script prints out "Door Hit", but not "Human touched door", we know the problem is somewhere in line 18 or 19 of the code. The Output window tells us that there is a problem on line 18 – FindFirstChild is failing. Ah! That is because in Lua methods are invoked using a colon (:) instead of a dot (.) (all other languages of consequence use dots for this – curse the inventors of Lua!) Change the line 18 to be:
local human = hit.Parent:FindFirstChild("Humanoid")
 And you have a working secret door that can be programmed to only let in your friends. To see it in action, check out SpecialDoor’s Place. If you are a new scripter and you are looking for some projects to work on, here are some easy adaptations of this script that you could do:
- Make the door let in everyone except those people who are on a blacklist (this is the opposite of the current door).
- Make the door flash different colors while it is open.
- Make the door heal you as you walk through it.
– Telamon